Part 2: 5 Things You Need To Start A Clear Aligner Business
October 14, 19 | 9 mins read
In our previous post, we talked about the origins, background and manufacturing process of clear aligners, an orthodontic marvel. Before you go ahead and make that investment towards your manufacturing line, it is good to know what is the exact equipment you need to start a clear aligner business of your own.
For the benefit of those who are new to digital dentistry, we will explain briefly what are the individual equipment is before going into details such as price and other purchasing considerations.
![]()
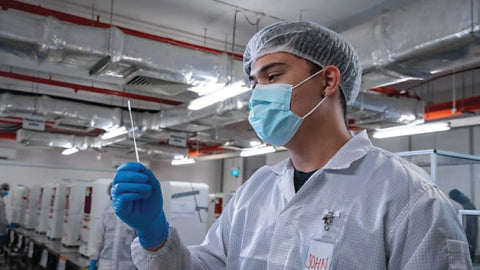
1. Digital Scanners - Intraoral And Desktop
The process of clear aligner manufacturing starts by capturing a digital impression. If you own your own practice and would like to send your scans to a lab to manufacture clear aligners, this is where it begins. Most modern-day laboratories these days accept digital scans on top of traditional impressions. If you own a lab or are looking to start your own aligner business, you have to be equipped to receive digital scans from your customers as they are becoming the standard of care today.
There are several factors you will need to consider before purchasing a digital scanner. In today’s modern day of the internet, it is much easier for dental professionals to research the different companies and products available in the market before making a purchase decision. While it helps to read up on online reviews and industry experts’ recommendations, you have to keep in mind that it is crucial for you to purchase a system that fits your own workflow. Some companies try to cover both the CAD and CAM part of the workflow, and this plays a key role. For example, if you opt for a CEREC digital scanner system, it is good to know that they also supply milling machines that integrates with your Other companies take a different approach towards completing the CAD/CAM workflow. For example, 3Shape only has digital scanners (intraoral and desktop) and software in their line up, but they do have system integrations with a wide variety of milling systems and 3D printers.
Next, you will need to consider ease of use. And for the case of intraoral scanners, the size of the wand (area going into the patient’s mouth) is key. If you are getting a lot of paediatrics cases for example, you would want to get a scanner that is compact enough to go into a smaller opening. Manufacturers have been taking a closer look at how to make scanners more user friendly. For example, at this year’s edition of IDS, 3Shape unveiled a wireless version of their TRIOS scanner.
Accuracy used to be an issue when considering different digital scanner brands. But the industry has progressed to the point where many systems out there are accurate enough for chairside use. Manufacturers even go the extra mile to prove this by releasing various white papers and research reports around this crucial topic.
Finally, the most important factor to consider, price. Generally, intraoral scanner prices have gone down significantly over the years thanks to increased competition with new market entrants from every part of the world. You will be working within a range of US$15,000 - $50,000. Keep in mind that you will need to allocate an annual subscription cost to the overall purchase price for the software license on top of your one-off device price.
Besides intraoral scanners, there are also desktop digital scanners, mainly used by labs that still accepts traditional stone impressions from their clients. Desktop scanners will allow you to digitize these traditional impressions to enable a digital design and manufacturing workflow.
2. Treatment Planning Software
The next thing you need to consider is the computer-aided design (CAD) component of your digital workflow. This is the software tool you need to design how much tooth movement is allowed per clear aligner step. There are numerous providers out there in the market, but you do have to be aware that some digital scanners come with some sort of orthodontic software bundled together with their product. So, before you go ahead and purchase an extra piece of software, check with your scanner sales rep what is included in the bundle that you just purchased.
Treatment planning software ranges anywhere between $5,000 to $20,000. Before purchasing, be sure that the software export files in a format that is compatible with your computer-aided manufacturing system of choice. As a general rule of thumb, most 3D printers today accepts STL files for printing.
If you would like to simplify your workflow a further step, there are also companies which provide treatment planning as a service for a fee. An example of such company is eXceed. All you have to do is upload your digital impression file to them and within a few working days you will receive the treatment plan for your approval. Upon approval, you will then receive the printable files, ready to be uploaded to your 3D printer.
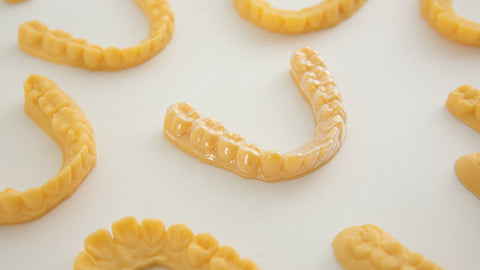
3. 3D Printers
After designing your treatment plan for your patient, you will now need to translate that digital file into a series of steps in the form of models using a 3D printer. There are numerous 3D printers out there in all shapes, sizes and prices. They range from desktop systems that will cost you a few thousand dollars all the way to industrial-sized systems that cost hundreds of thousands.
The most commonly-used 3D printing technology in dentistry is vat photopolymerization or resin-based 3D printing. In this category of 3D printing you have Stereolithography (SLA), Digital Light Processing (DLP), and Mask Stereolithography (MSLA). Each method has its inherent pros and cons.
In a nutshell, SLA printers deliver accurate prints at the expense of printing speed and throughput. This is due to the nature of the technology whereby a single light source in the form of a laser is used to selectively cure liquid resin by “tracing” the object point by point. The larger the object or the more amount of objects, the longer it will take for the light source to trace, increasing the overall print time.
As for Digital Light Processing (DLP) printers, the problem of slow print time experienced by SLA printers is solved by substituting the laser light source for a projector that projects the image of an entire layer of the object at the resin. This allows for faster print time since the technology prints each object layer by layer. However, since DLP still uses a single light source, the light intensity towards the middle of the platform, much closer to the light source would be much more intense than on the edges of the platform, further away from the light source. Therefore, DLP technology faces an issue of scaling up the build area once it reaches a certain size. As you gradually scale up, the light intensity on the edges of the platform will get weaker and weaker, causing issues with print accuracy.
Mask Stereolithography (MSLA) solves problems faced by SLA and DLP by utilizing an array light source instead of a single light source. On top of this array is a digital mask that controls which area of the build platform is illuminated at any given time. Wherever the digital mask permits light to pass through, the light will strike the resin above it causing it to form a layer of the printed object. Therefore, similar to DLP. MSLA prints objects layer by layer, delivering superior speeds and the throughput required for mass manufacturing, but also solves the issue of scalability by utilizing numerous individual light sources instead of one.

Mask Stereolithography (MSLA) Technology
Click here to learn more about MSLA
4. Thermoforming Machines
Just like 3D printers, thermoforming machines come in all shapes, sizes and prices. When it comes to clear aligners manufacturing, what you really need to focus on are 3 crucial factors. The most important of all is the quality of the thermoformed aligner. A good thermoforming machine will deliver aligners that are the perfect negative of the model used. Always ask your sales rep for a sample before making your purchase decision. If you notice air pockets in between the aligner and the model inside, that is not the right machine for you.
Secondly, you have to pay attention to the temperature the thermoforming machine uses to heat up its plastic sheets. Make sure that it is compatible with the models produced by your 3D printers. Ask your 3D printer sales rep for a datasheet of the material you are printing your models with to check what is the highest temperature the material can withstand. Also, you have to ensure that the material does not leech into the final appliance during the thermoforming process. It is best to opt for materials that are formulated specifically for thermoforming applications as it would address all these issues.
Finally, while most thermoforming machines are relatively simple to use, be sure to go through the workflow with your sales rep several times to see if there are any possible bottlenecks. You want a workflow that is as simple as possible to ensure a seamless manufacturing process.
5. A Brand
This does not cost you anything, but it may make or break your clear aligner business. Incumbent players have done an incredible job marketing their brands directly to consumers, driving demand up from everyday people instead of going through practices or labs. The good news is a large portion of your market already knows what clear aligners are thanks to these efforts. Your challenge now is to convince them that your brand of clear aligners is superior than that of more established brands out there. And the easiest way to put yourself on the front foot is to start with an optimized manufacturing process that gives you the cost advantage to compete in this billion-dollar industry.
Do you have what it takes to be the next big aligner brand?
We will help you take the first step towards validating your business model.
Use our ROI calculator to determine your pricing point and the time needed for you to see a return of investment: